ChatGPT is powerful on its own, but when you need it to interact with external systems—databases, APIs, or private services—you need more than just prompts. You need a structured, secure way to connect AI with the outside world.
That's exactly what the Model Context Protocol (MCP) enables. With MCP, you can give ChatGPT the ability to call real APIs, fetch live data, and perform actions—all through a standardized interface that's secure, auditable, and easy to manage.
In this tutorial, you'll learn how to:
- Enable Developer Mode in ChatGPT
- Build an MCP server using mcp-builder.ai
- Configure OAuth authentication for secure API access
- Connect your MCP server to ChatGPT
By the end, you'll have a working ChatGPT integration that can query and interact with any API you expose through MCP.
What Is ChatGPT MCP?
ChatGPT MCP refers to ChatGPT's ability to connect with MCP-compliant servers. This gives ChatGPT structured access to external tools and APIs in a way that's:
Secure Access
Access live or private data securely through OAuth and token-based authentication.
Real Actions
Perform real actions like creating, updating, or calculating—not just generating text.
Explicit & Auditable
Keep tool behavior explicit and auditable for compliance and debugging.
Standardized Connectivity
Avoid one-off integrations—connect once using MCP and reuse everywhere.
Think of MCP as the universal adapter that lets ChatGPT plug into any API without custom code for each integration.
Prerequisites
Before you begin, make sure you have:
- A ChatGPT Plus, Team, or Enterprise account (Developer Mode requires a paid plan)
- An account on MCP-Builder.ai
- An OpenAPI specification for your API (we'll use the Pet Store API as an example)
- Basic understanding of OAuth 2.0 concepts
Step 1: Enable Developer Mode in ChatGPT
First, you need to enable Developer Mode in ChatGPT to connect custom MCP servers.
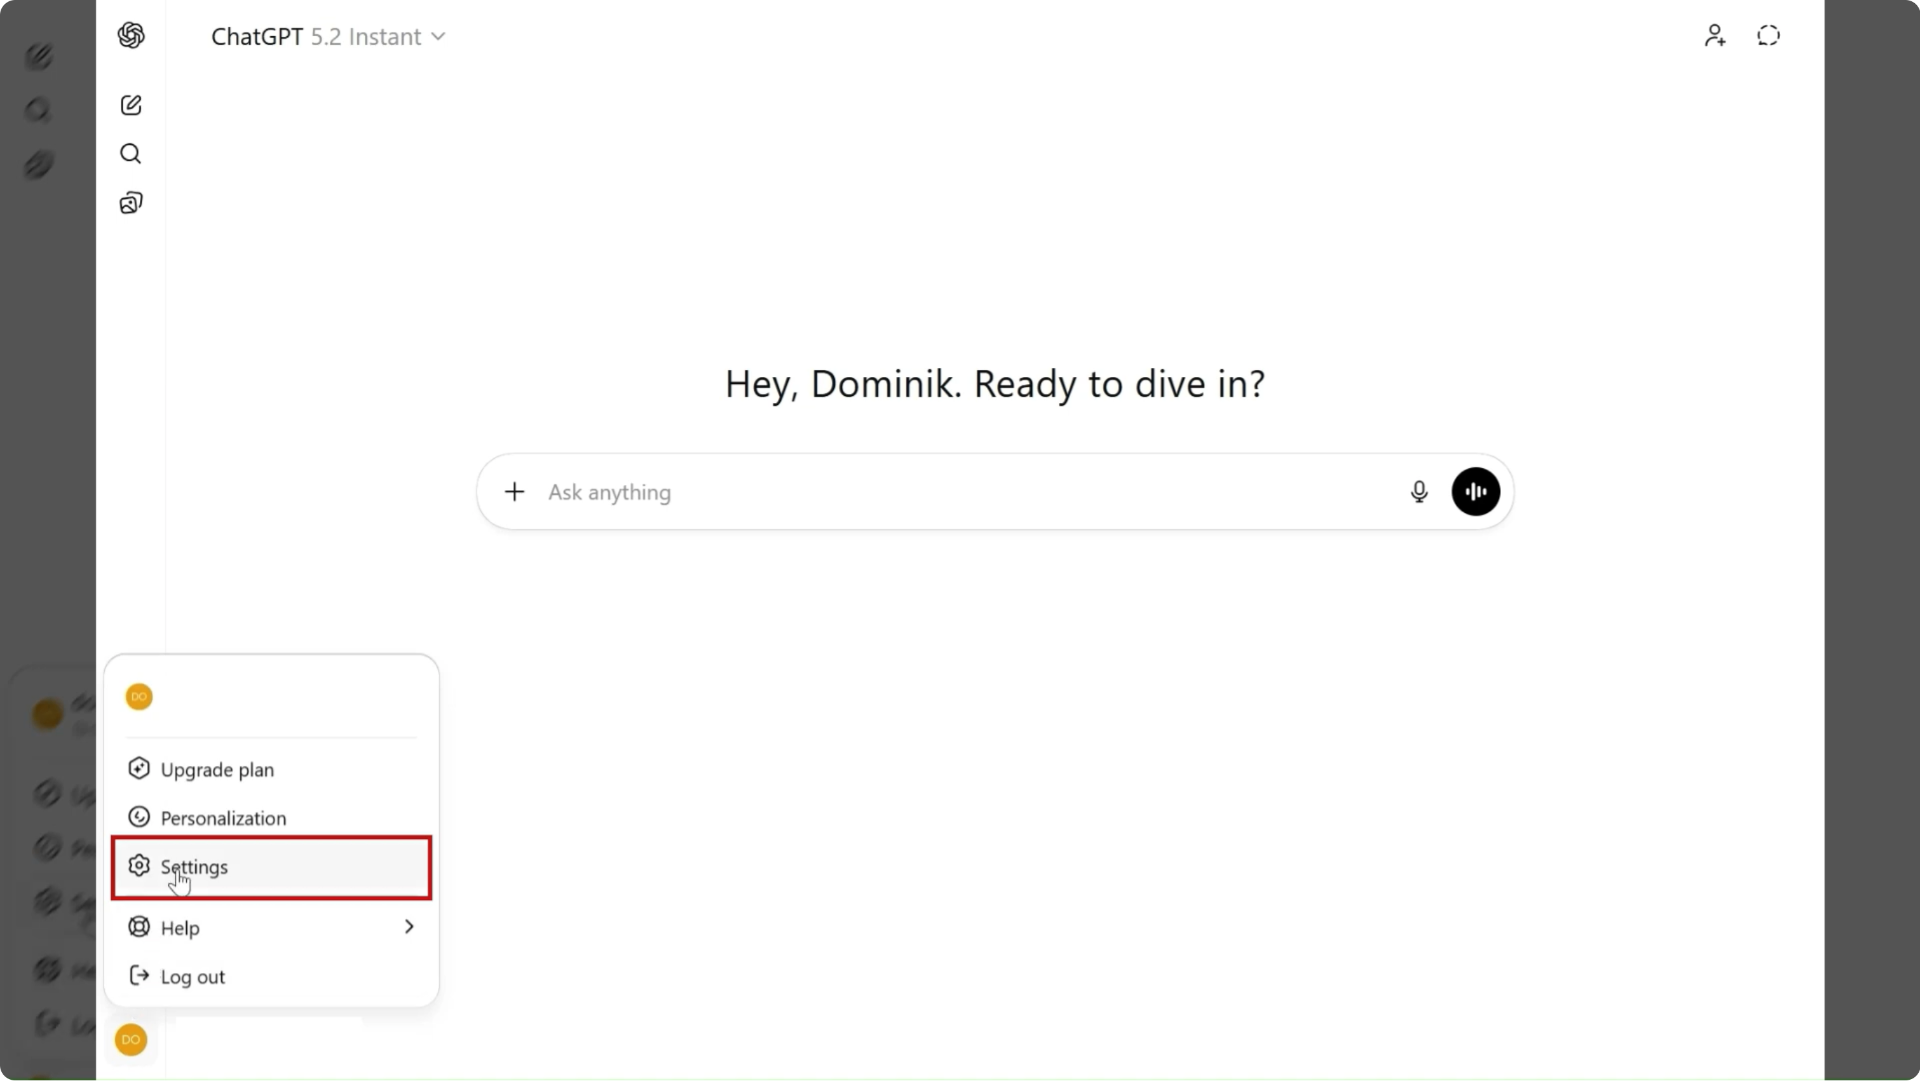
1. Open ChatGPT Settings:
Click on your profile icon and select "Settings" from the dropdown menu.
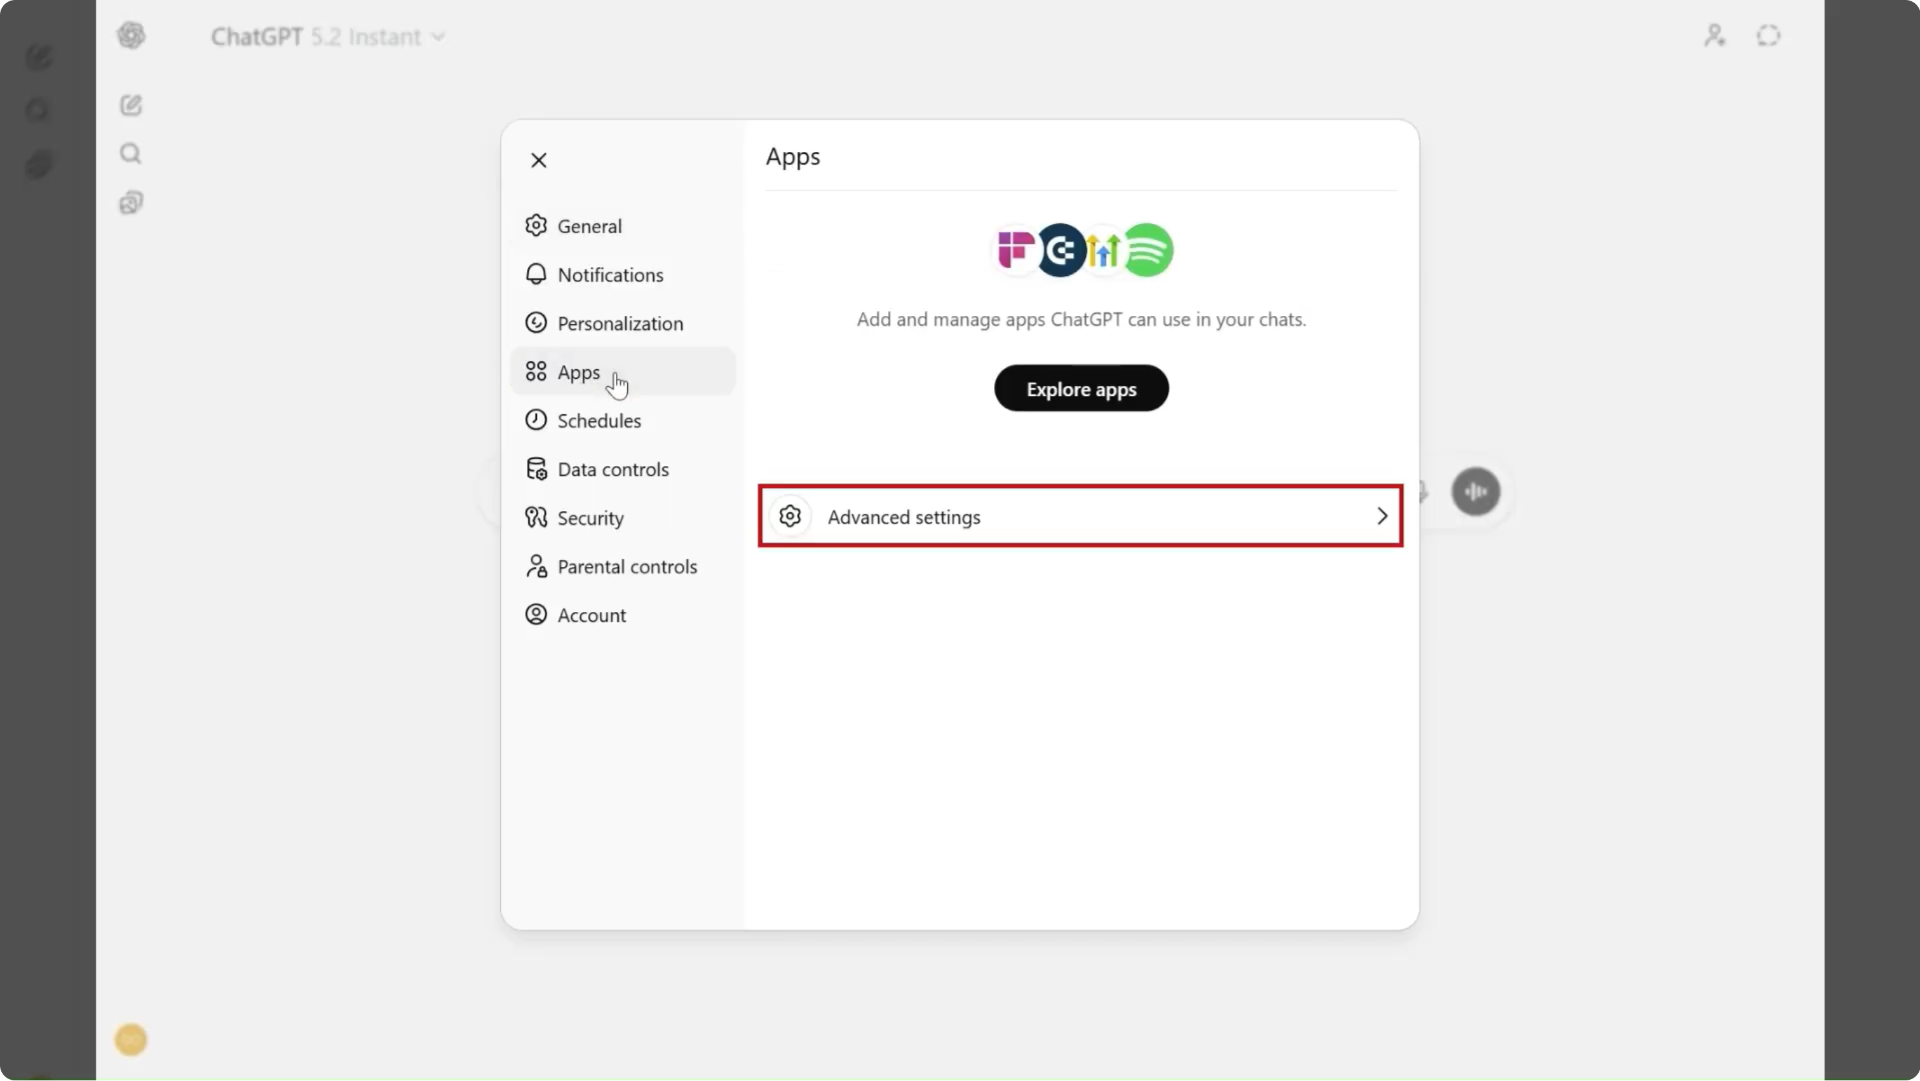
2. Navigate to Apps:
In the settings sidebar, find and click on "Apps" to access developer options.
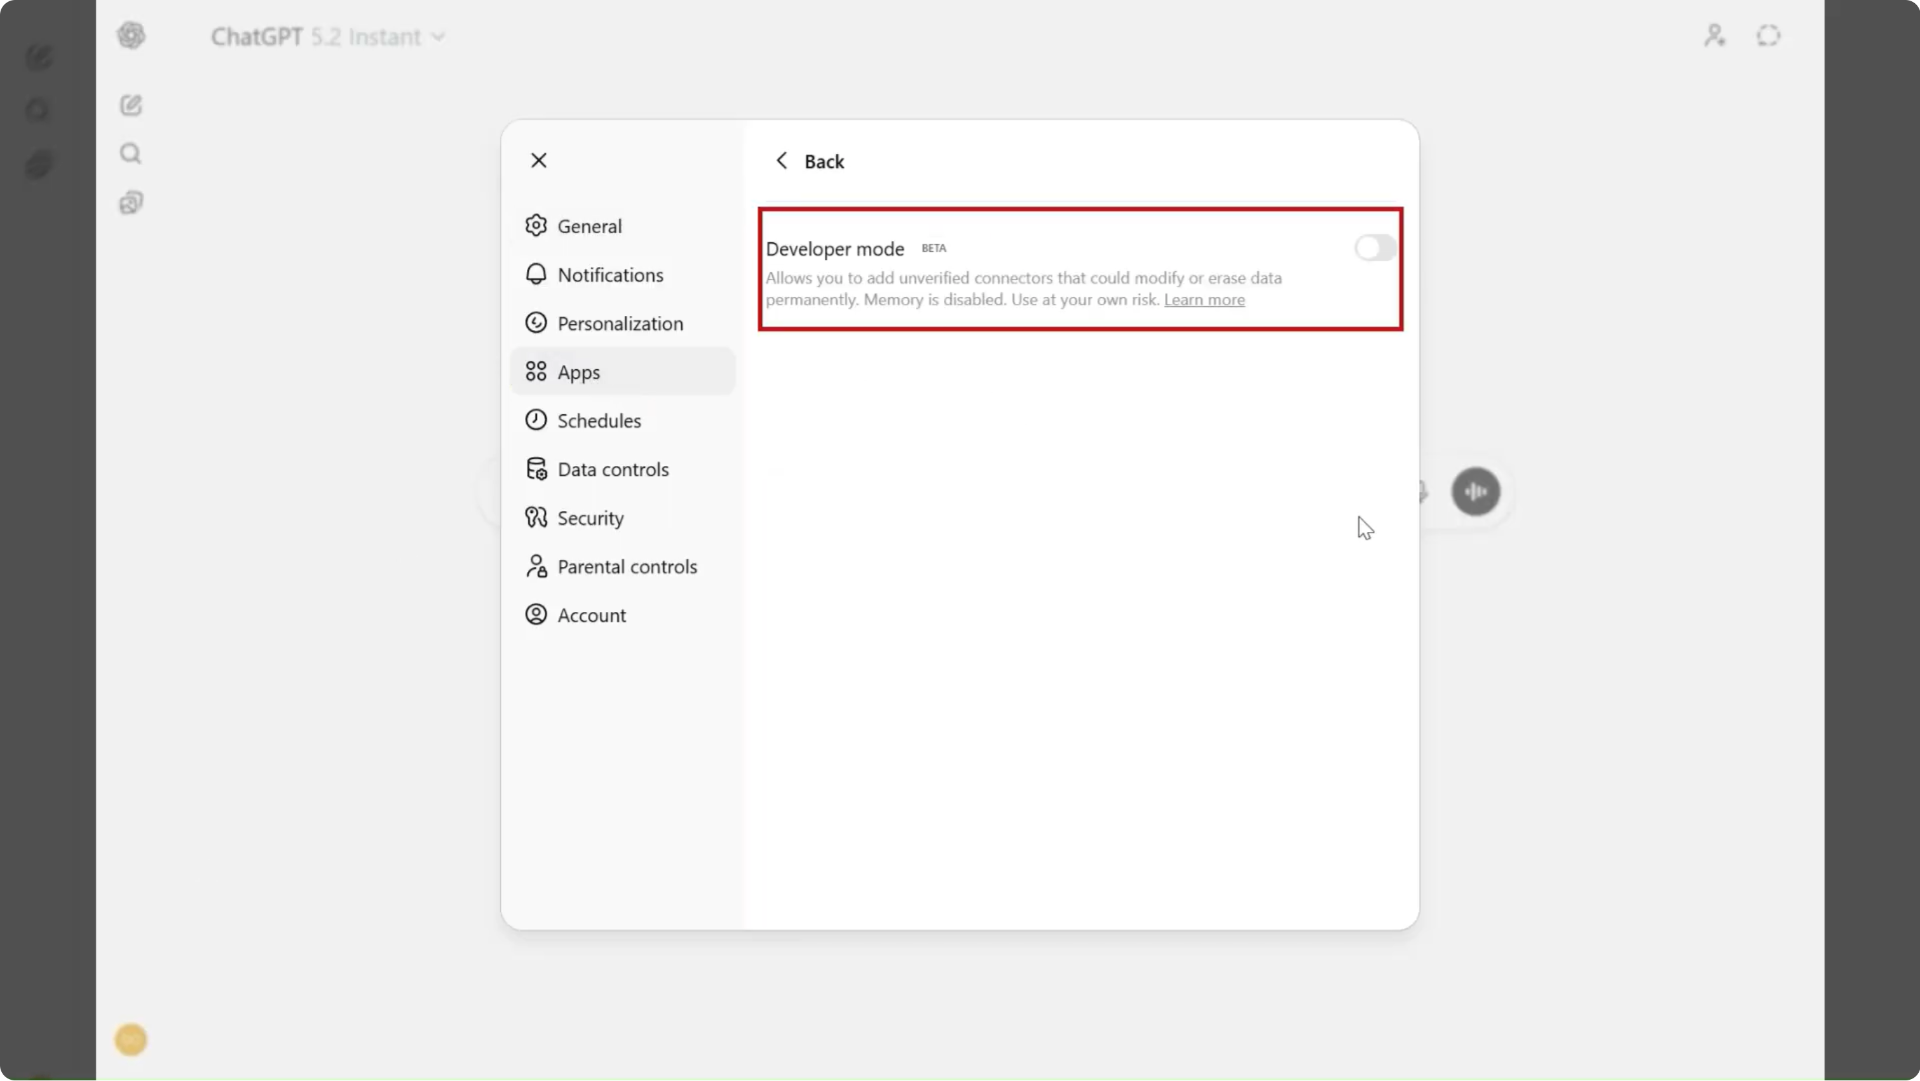
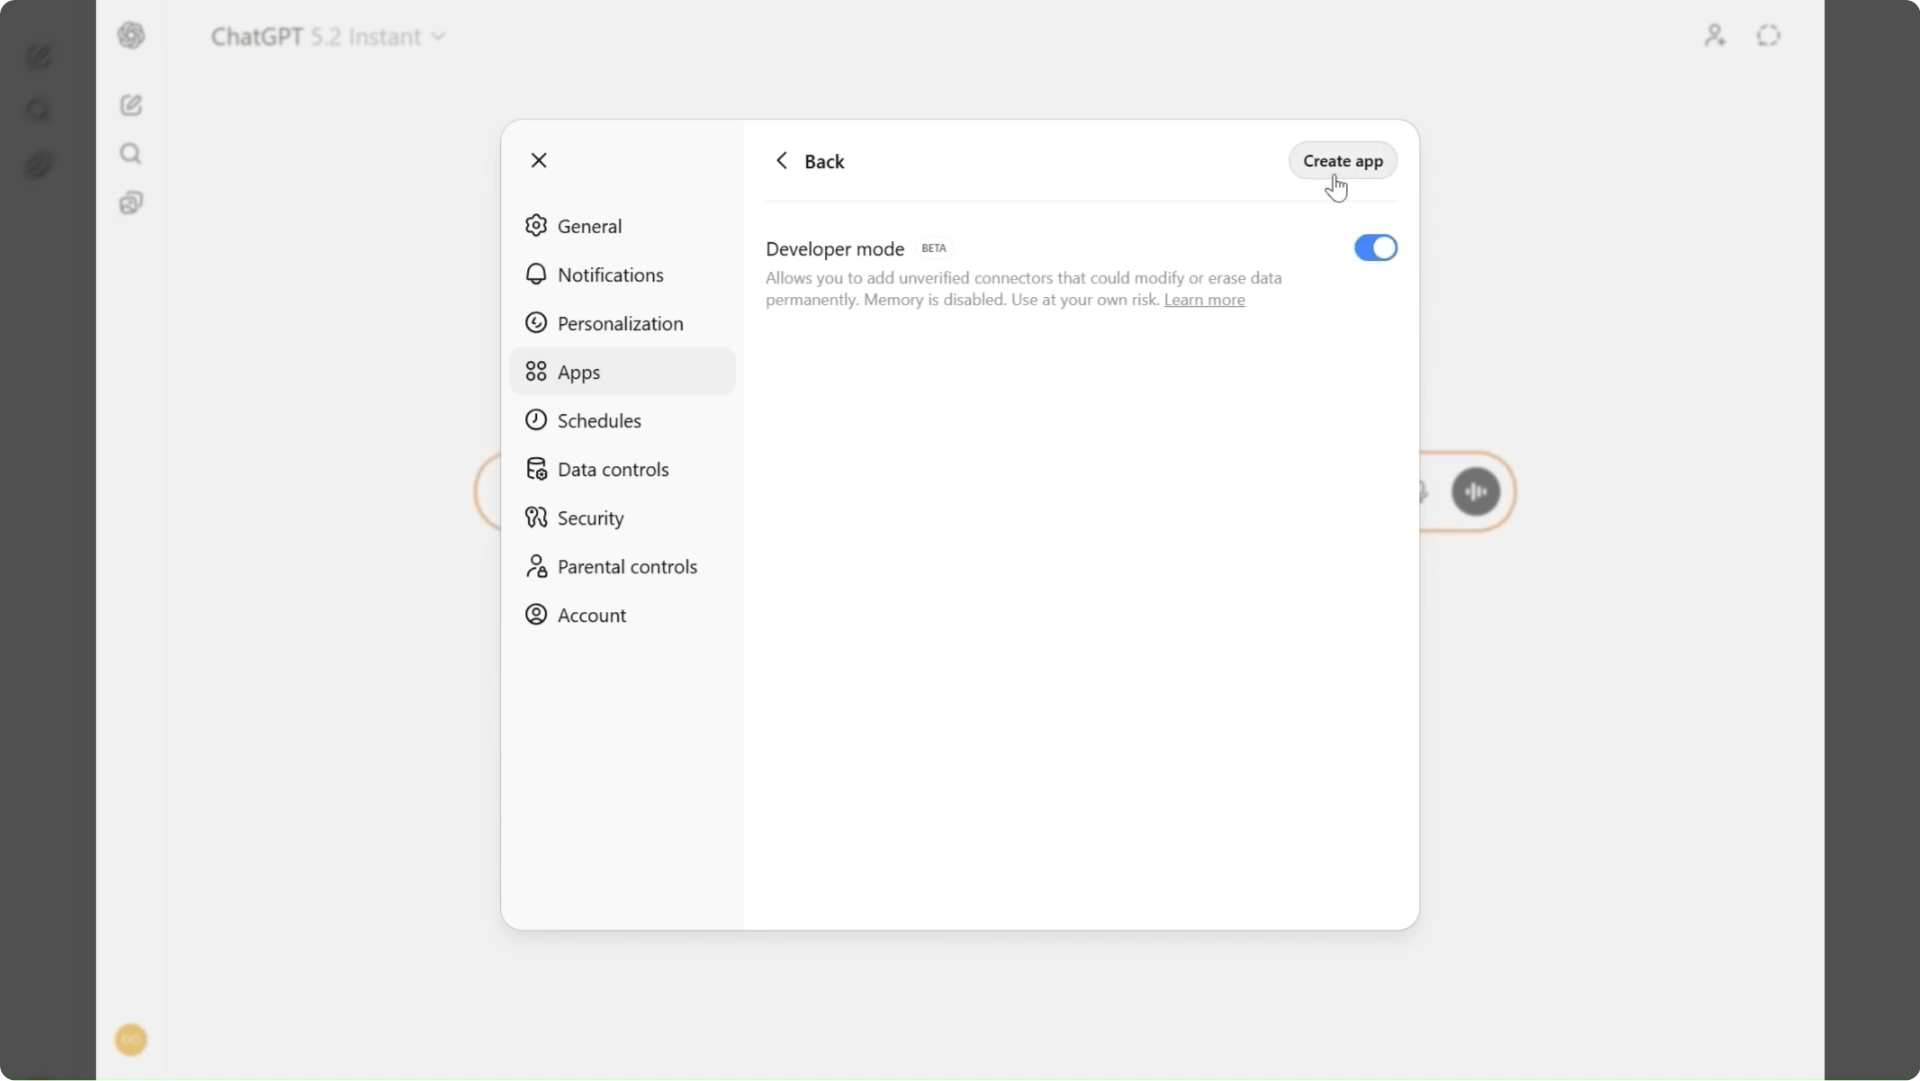
3. Enable Developer Mode:
Toggle the Developer Mode switch to enable custom app integrations.
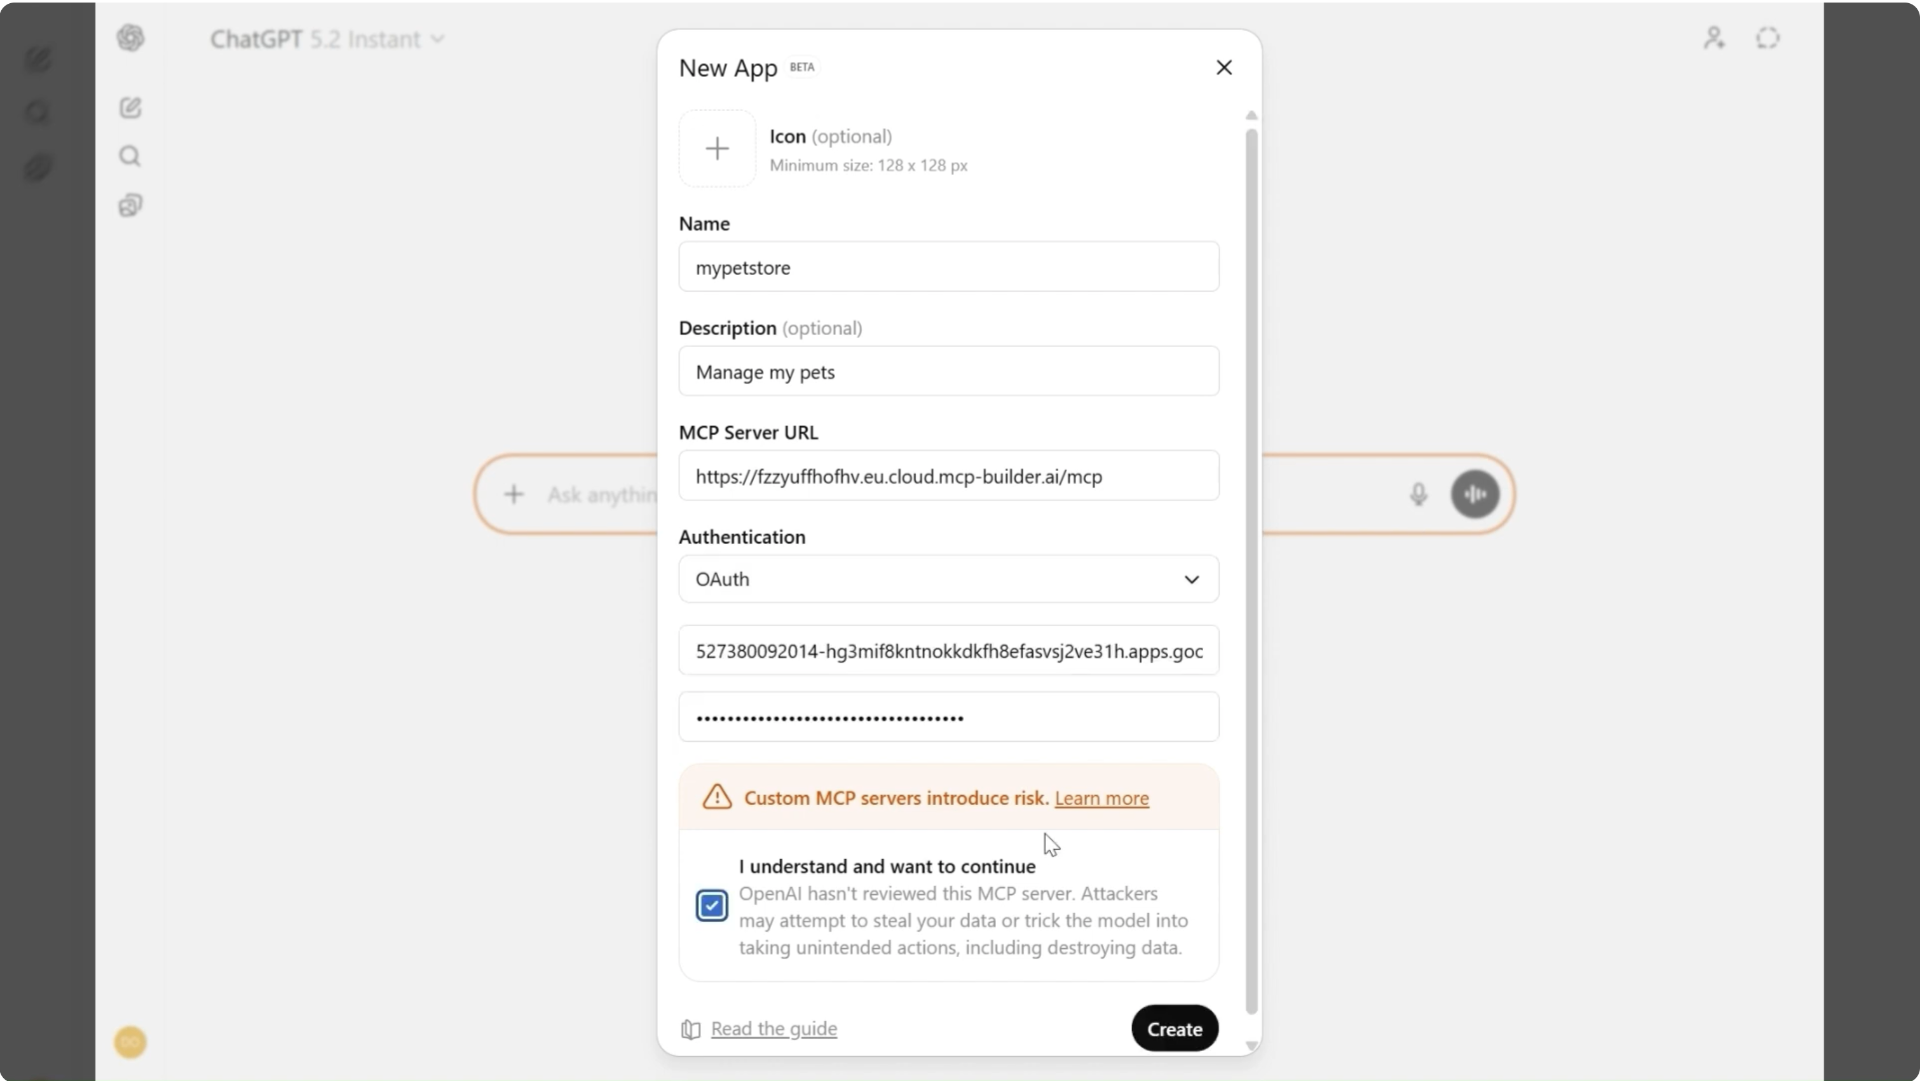
4. Create New App:
Once Developer Mode is enabled, you'll see the option to create a new app. Click "Create New App" or the "+" button.
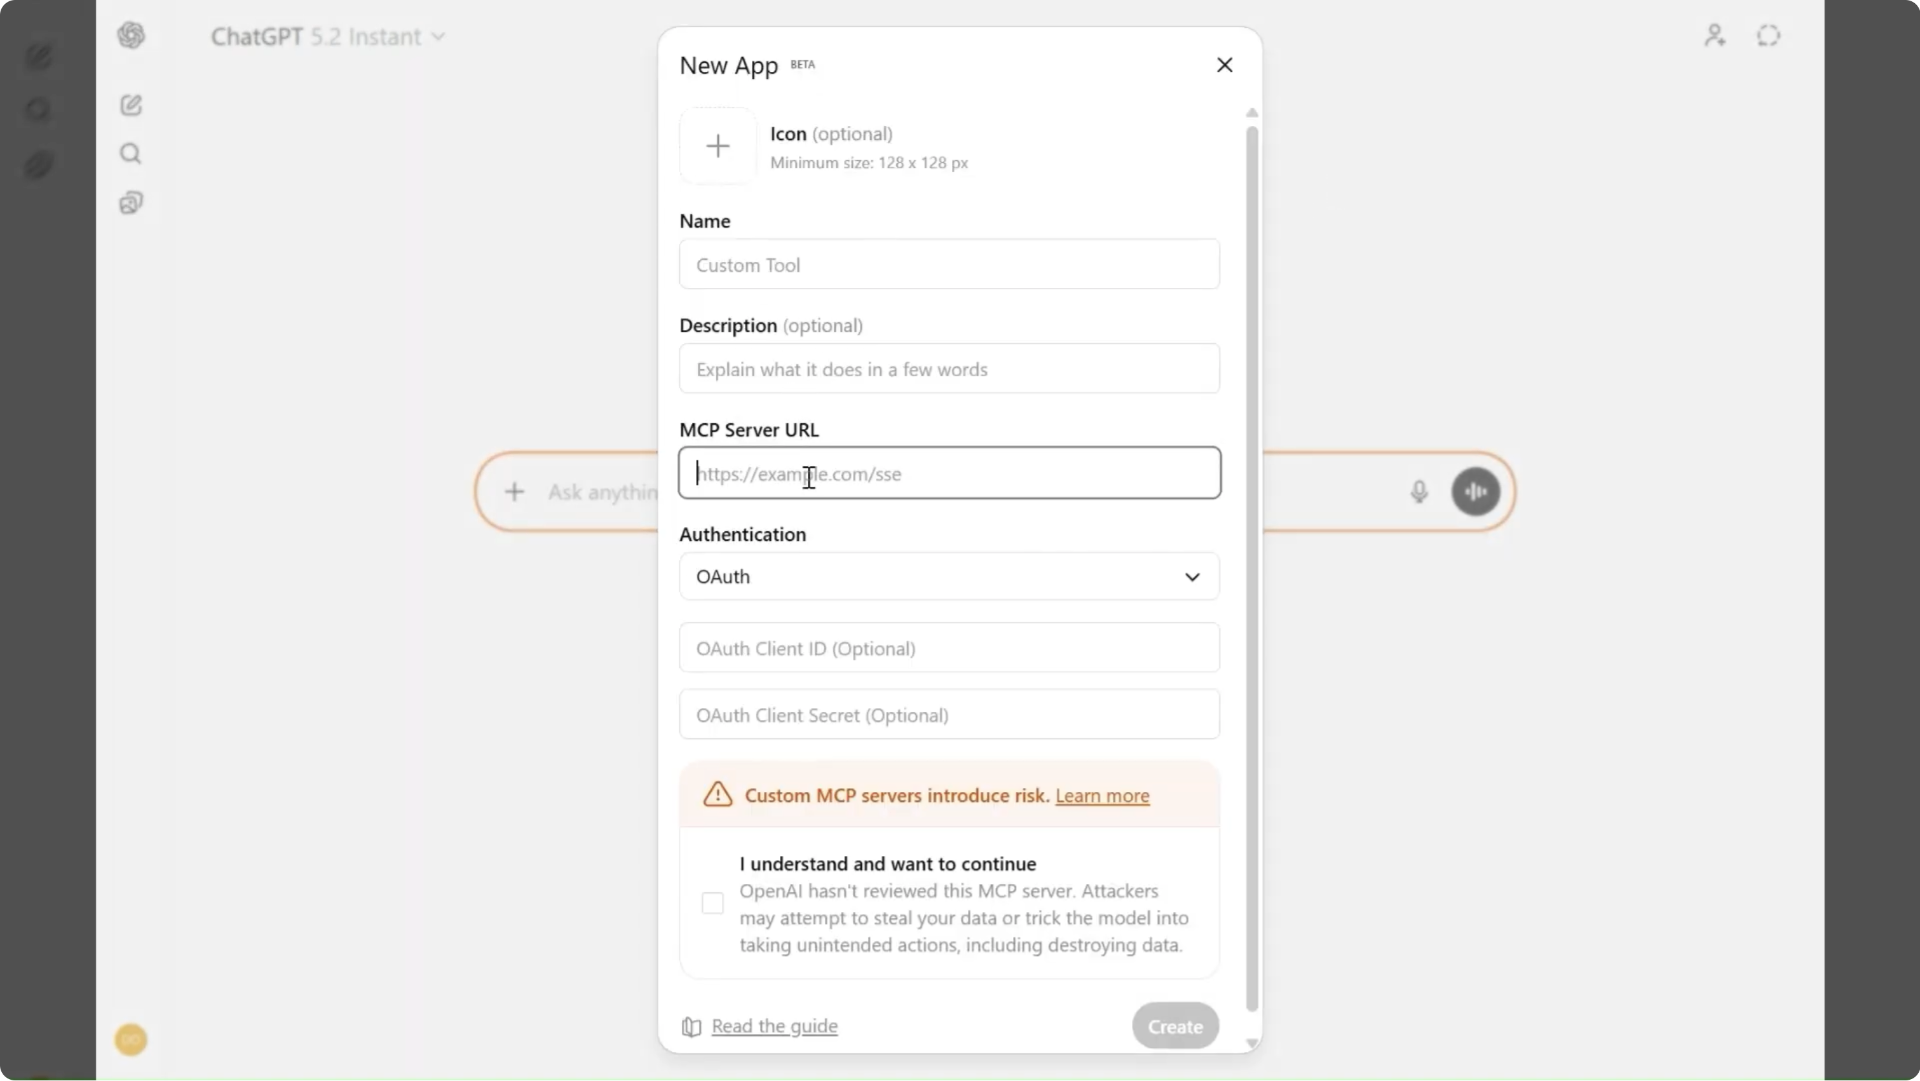
5. New App Created:
Your new app is now created. Take note of the OAuth Redirect URL—you'll need this when configuring your MCP server.
Step 2: Build Your ChatGPT MCP Server with mcp-builder.ai.
Now let's create an MCP server using mcp-builder.ai. We'll use the Pet Store API as our example—a simple API that's perfect for learning.
Why MCP Builder?
No Code Required
Upload your OpenAPI spec and get a running MCP server in minutes.
Built-in OAuth
Configure OAuth authentication without writing security code.
Cloud Hosted
Your MCP server runs in the cloud—no infrastructure to manage.
1. Get Your OpenAPI Specification:
For this tutorial, we'll use the Pet Store API. You can find OpenAPI specs for many popular APIs online, or create one for your own API.
2. Open MCP Builder:
Navigate to MCP-Builder.ai and sign in to your account. Then click on the "Start Building for Free" black box.

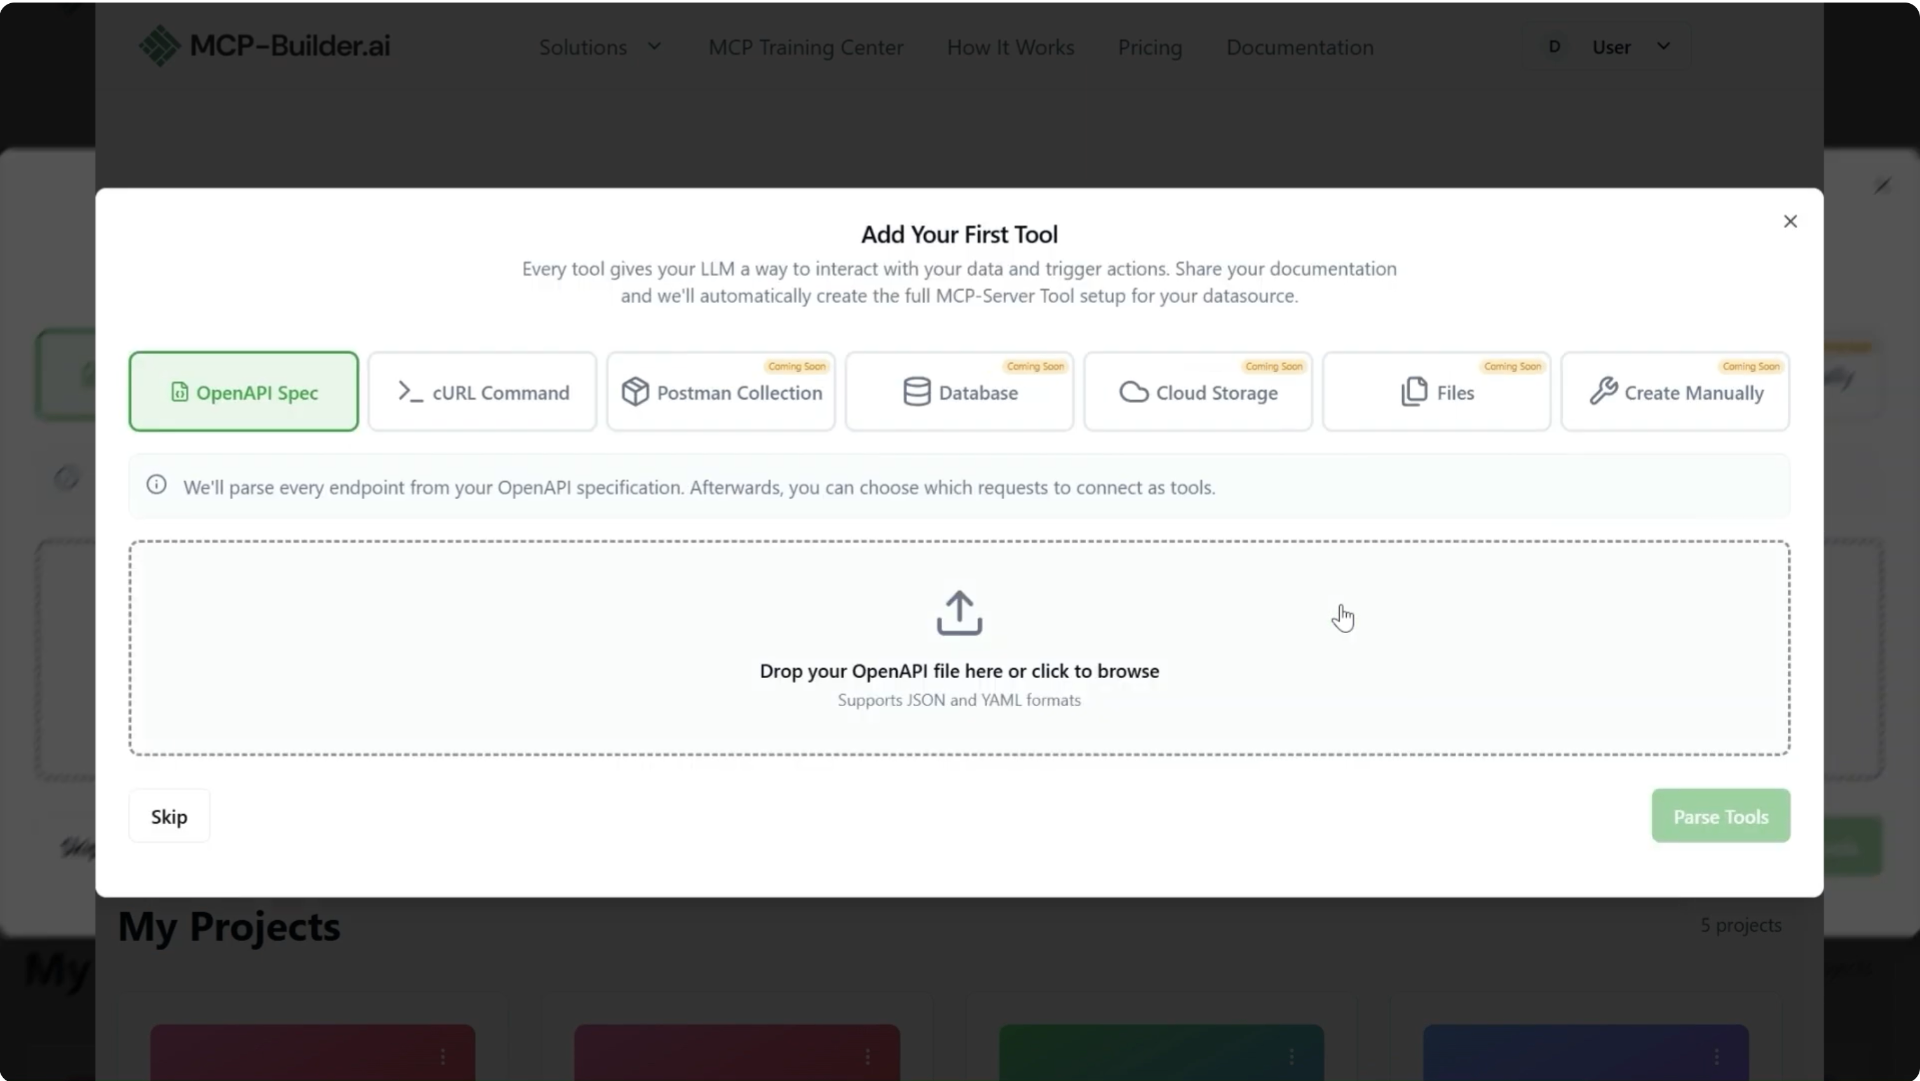
3. Upload Your OpenAPI Spec:
Create a new project and upload your OpenAPI specification file.
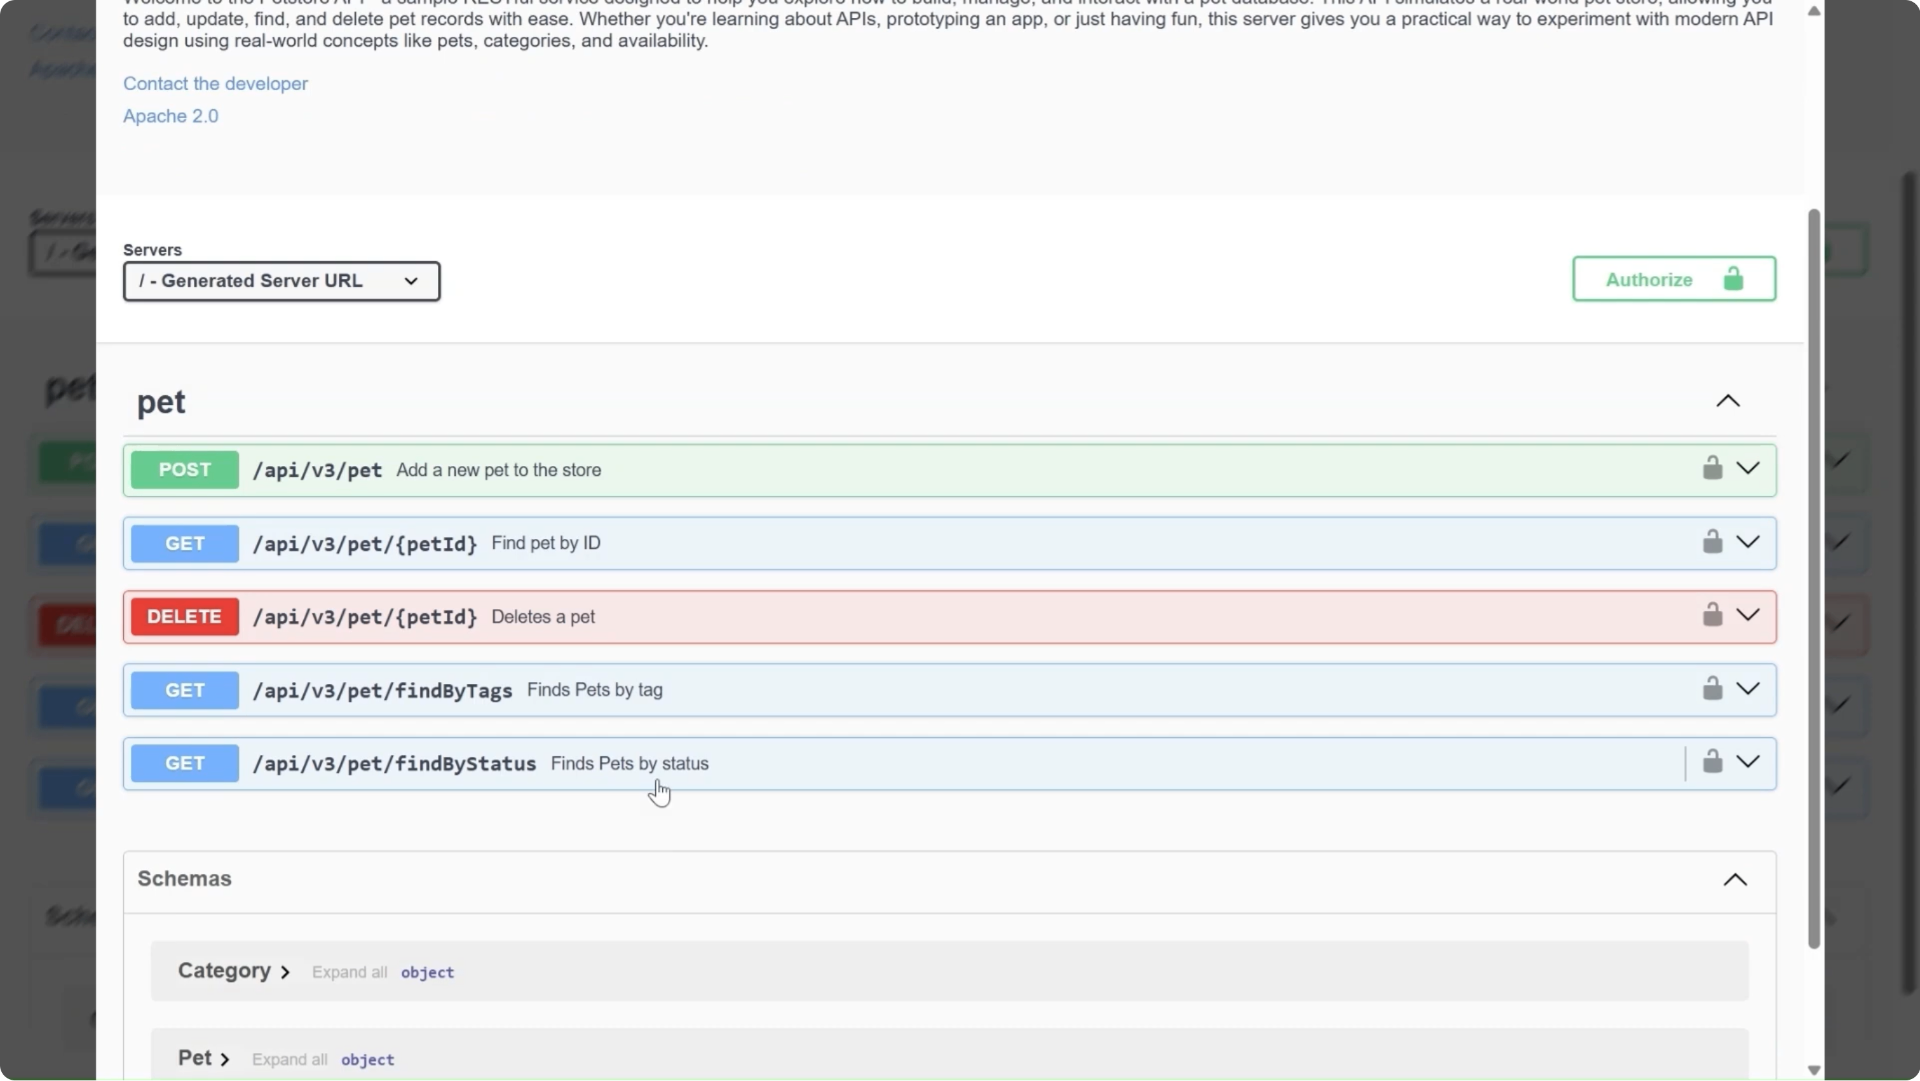
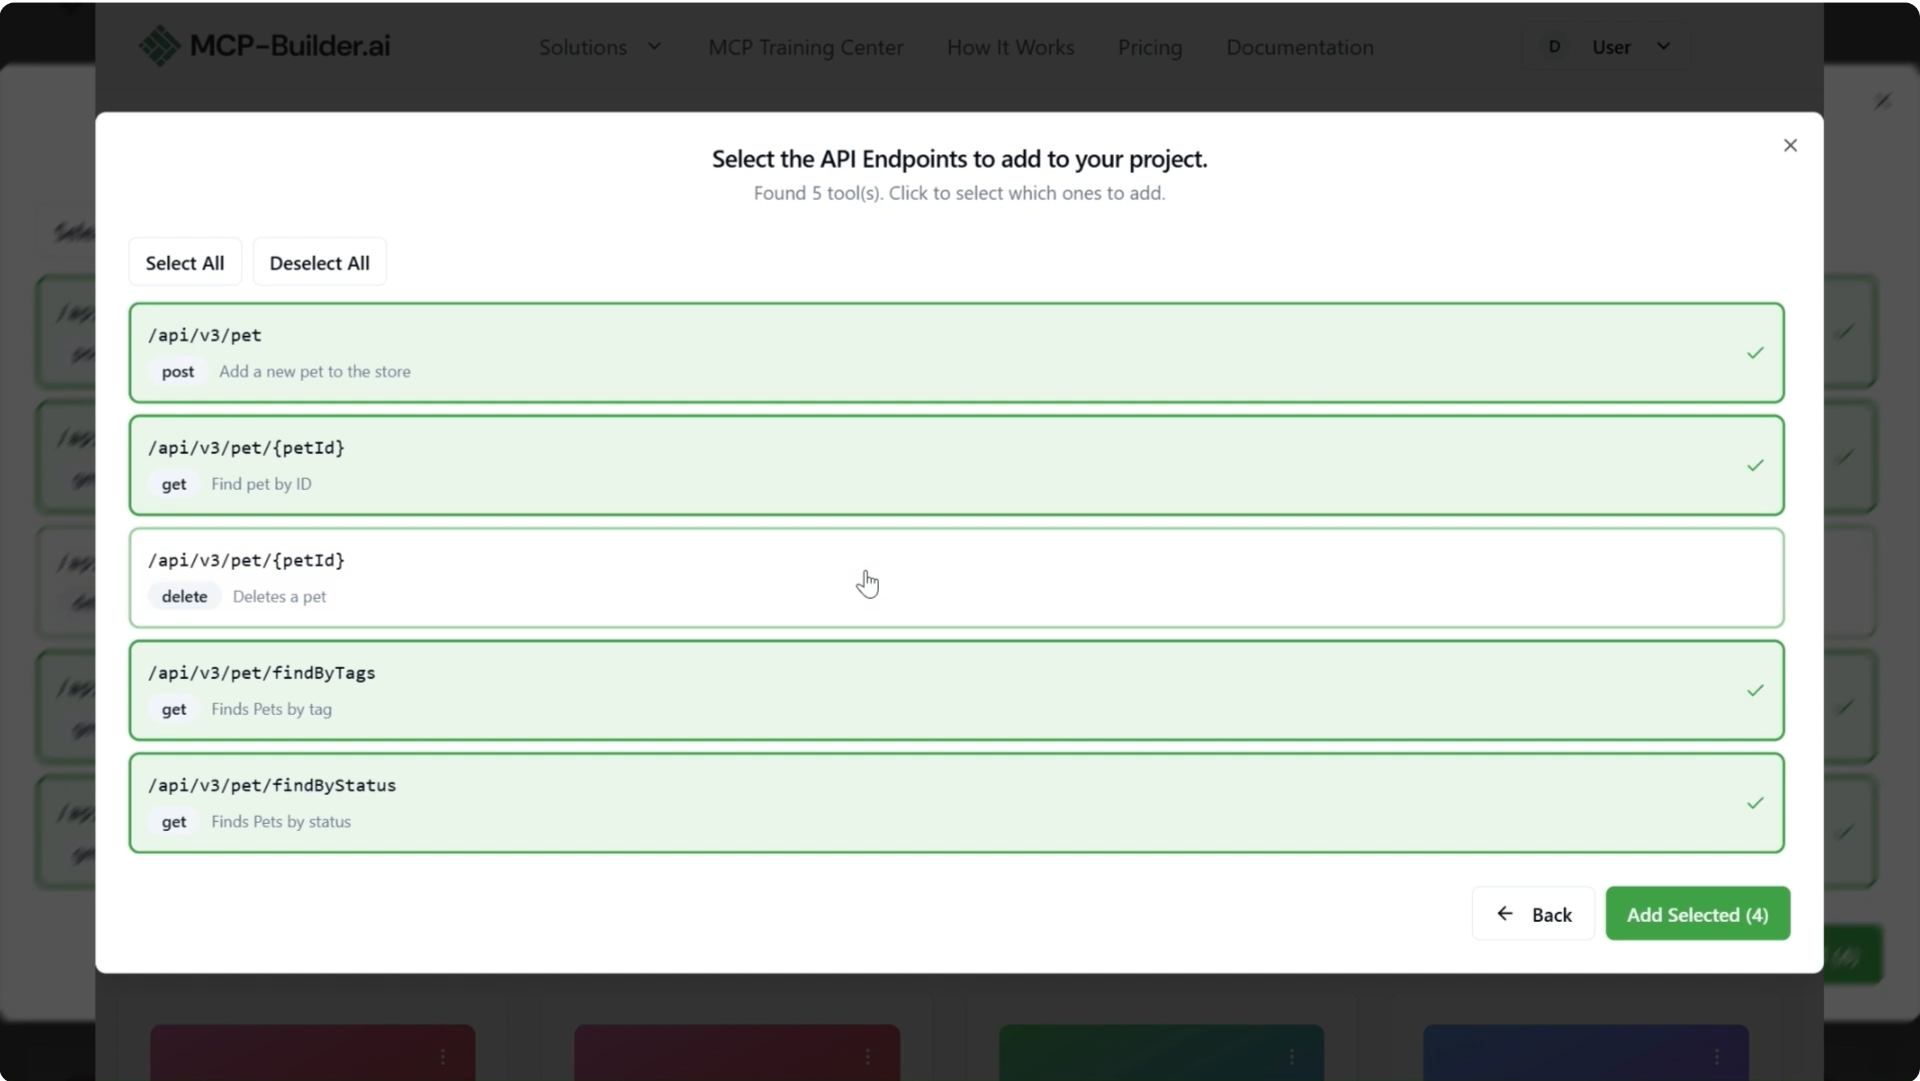
4. Select API Endpoints:
Choose which API endpoints you want to expose as MCP tools. You can select or deselect individual operations based on what you want ChatGPT to access.
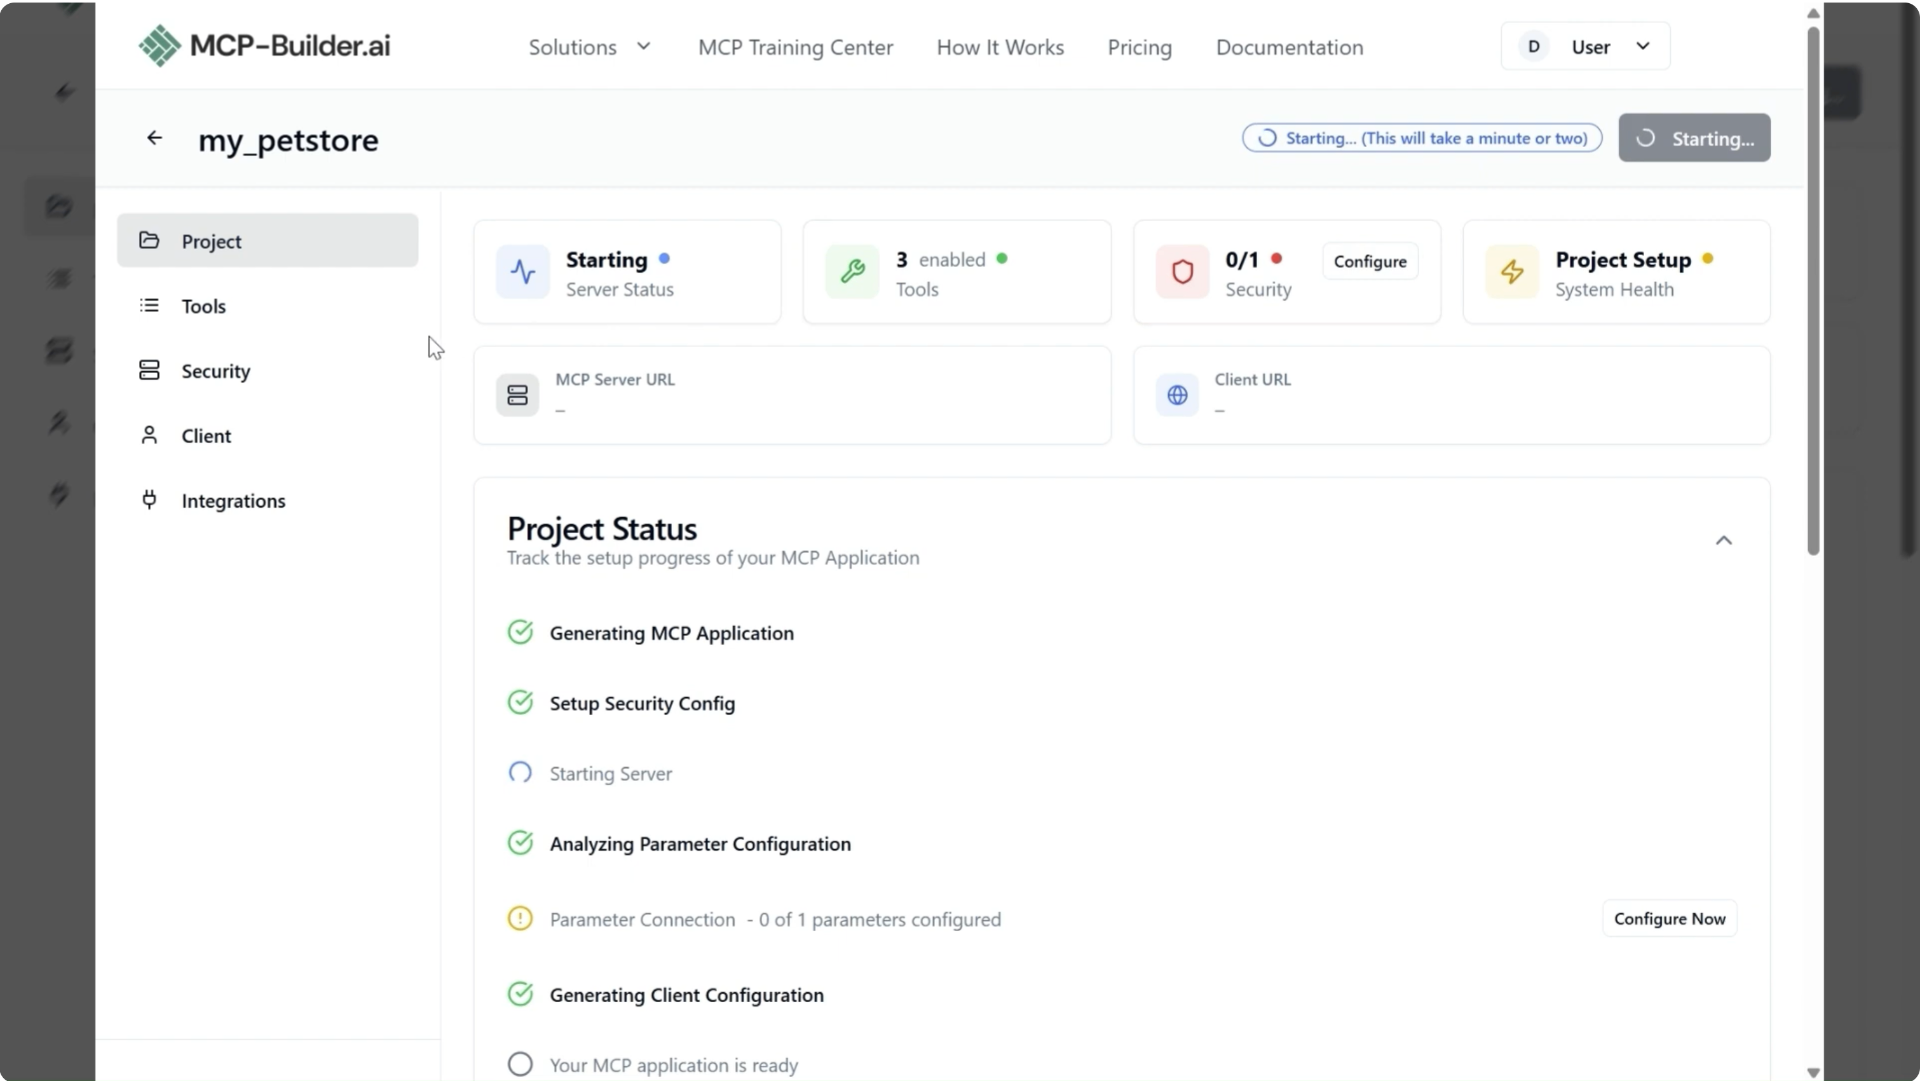
5. View Your Project:
Your MCP server project is now created. You can see the server URL and manage your configuration from this page.
🎉 Your MCP server is created! Now let's configure authentication.
Configure OAuth Authentication
ChatGPT requires OAuth 2.0 authentication for custom apps. Let's set this up in your MCP server.
Depending on your data source and project requirements, you'll usually want to secure your MCP server rather than expose it publicly. Both ChatGPT and mcp-builder.ai support OAuth Discovery Mode (an MCP standard) to make OAuth setup and integration straightforward.
In MCP Builder, you register your OAuth server by providing the issuer URL. In ChatGPT, you then enter the client ID and client secret, and complete authentication by signing in to your OAuth provider.
Authentication is a required step when connecting ChatGPT to MCP servers.
Important: ChatGPT currently supports OAuth 2.0 authentication, not API keys.
6. Open Authentication Settings:
Navigate to the Security section in your MCP project settings.
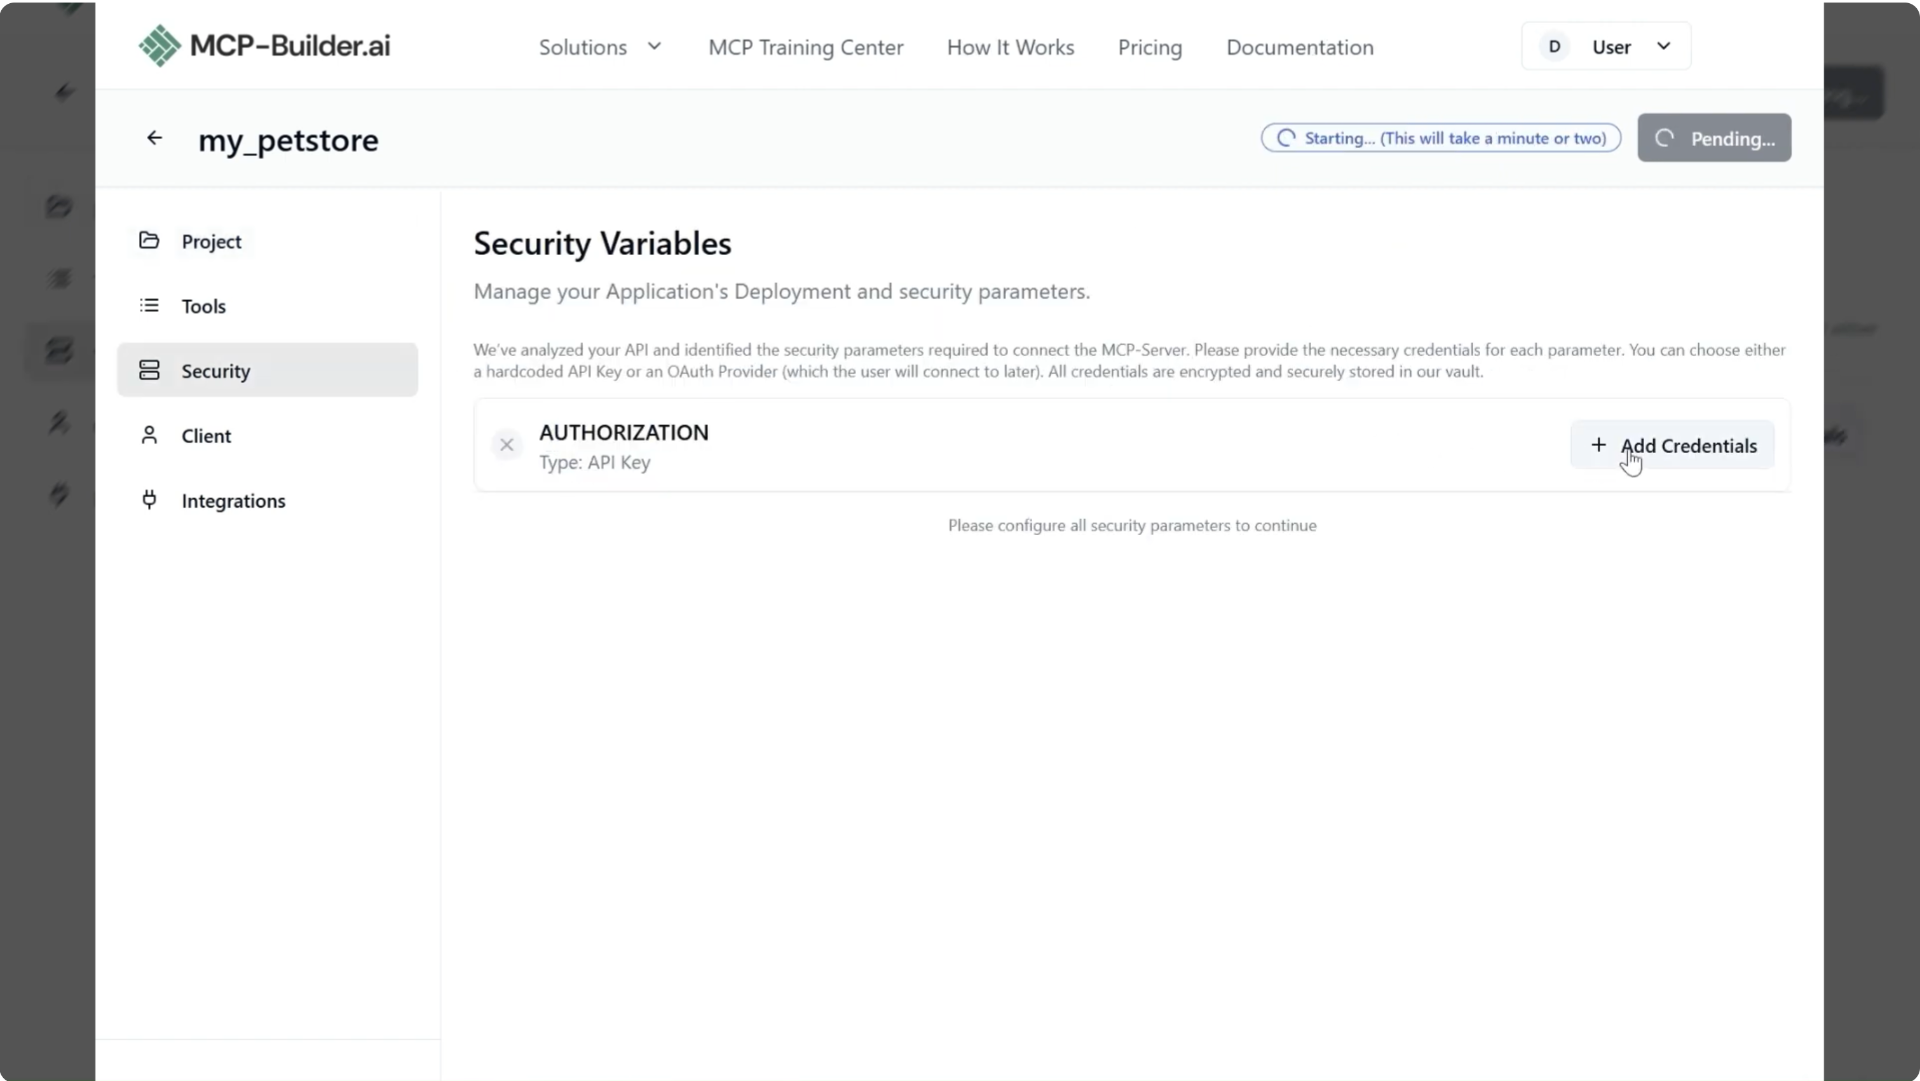
7. Configure OAuth 2.0:
Select OAuth 2.0 (Server Discovery - opaque) as your authentication method and enter the required details:
- Authorization URL: The OAuth authorization endpoint of your API
- Scopes: The permissions your app needs

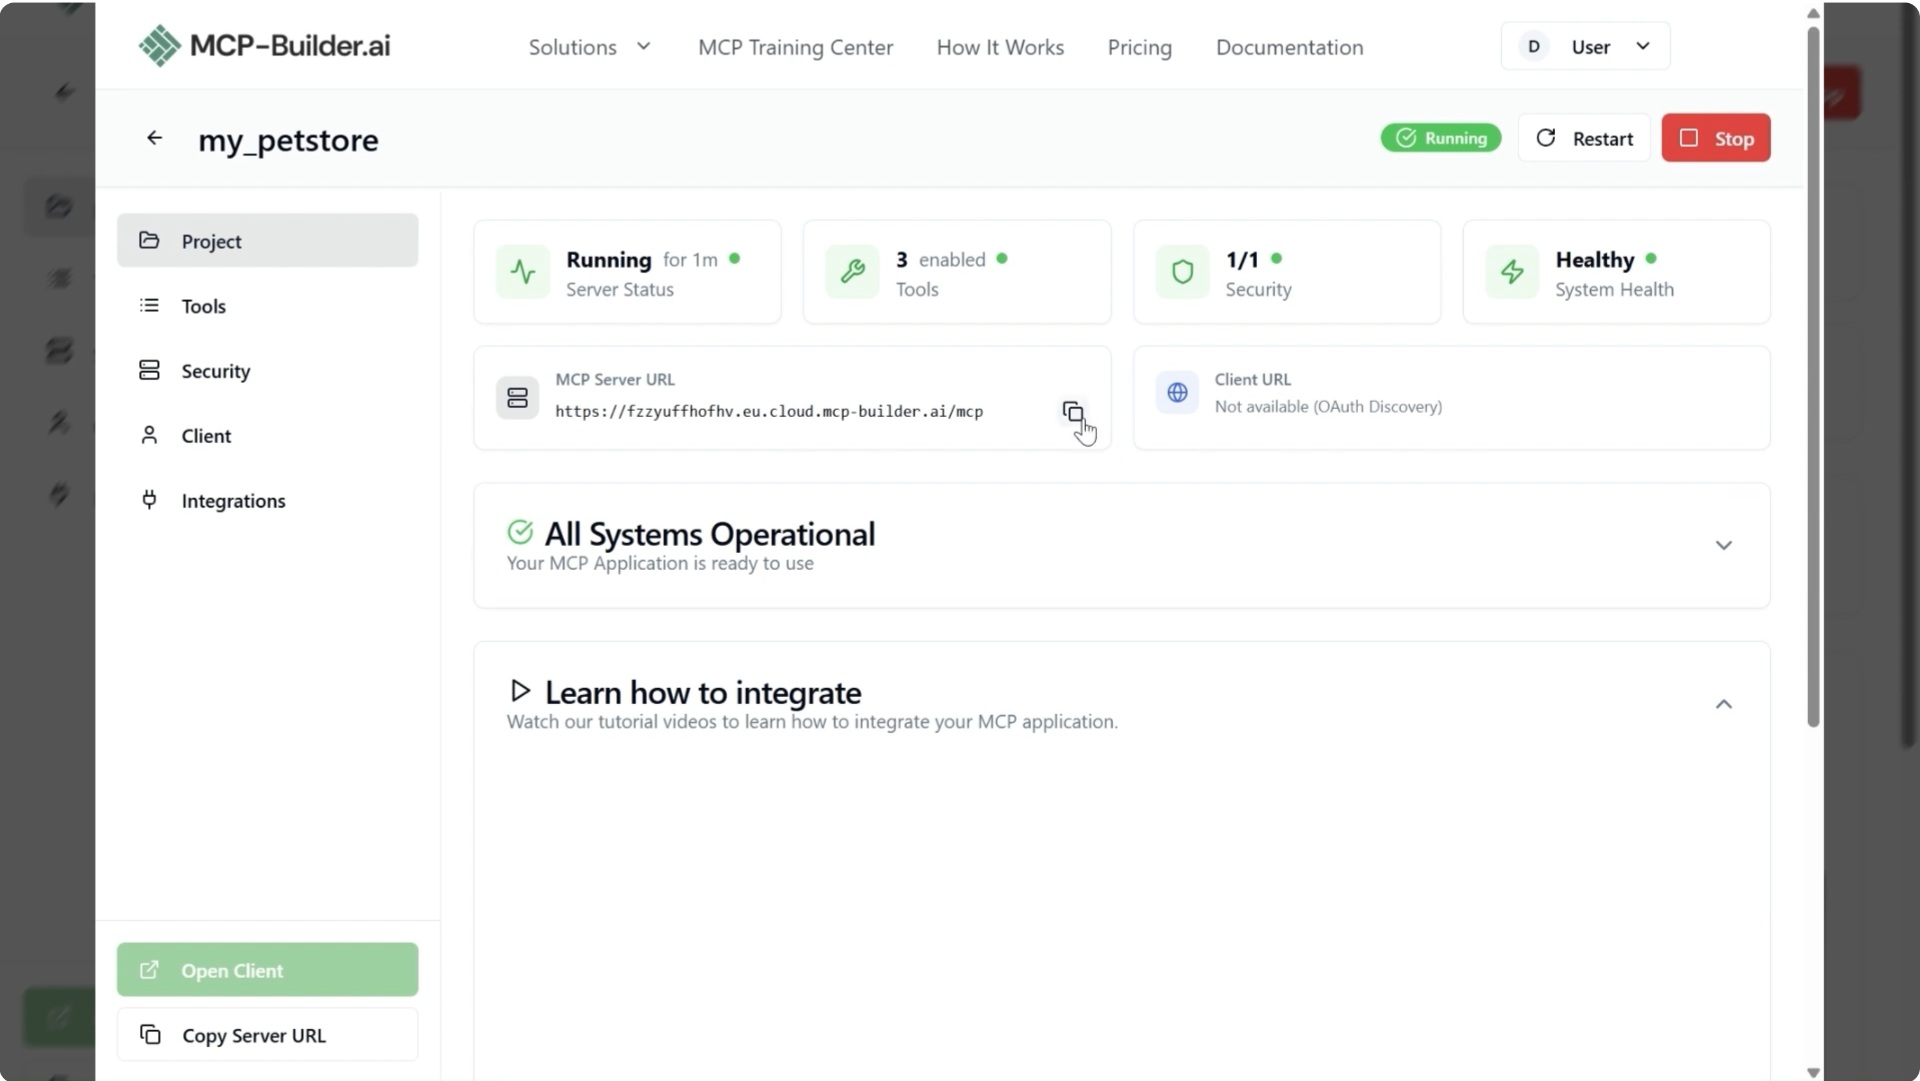
8. Copy Your MCP Server URL:
Once authentication is configured, copy your MCP server URL. You'll need this to connect ChatGPT.
Step 3: Connect Your MCP Server to ChatGPT
Now comes the exciting part—connecting your MCP server to ChatGPT!
1. Add MCP Server URL:
Go back to your ChatGPT app settings and paste your MCP server URL in the connection field.
ChatGPT completes the OAuth flow using the following redirect URL:
https://chatgpt.com/connector_platform_oauth_redirectMake sure this production redirect URI is added to your authorization server's allowlist. Without this step, OAuth authentication will fail.
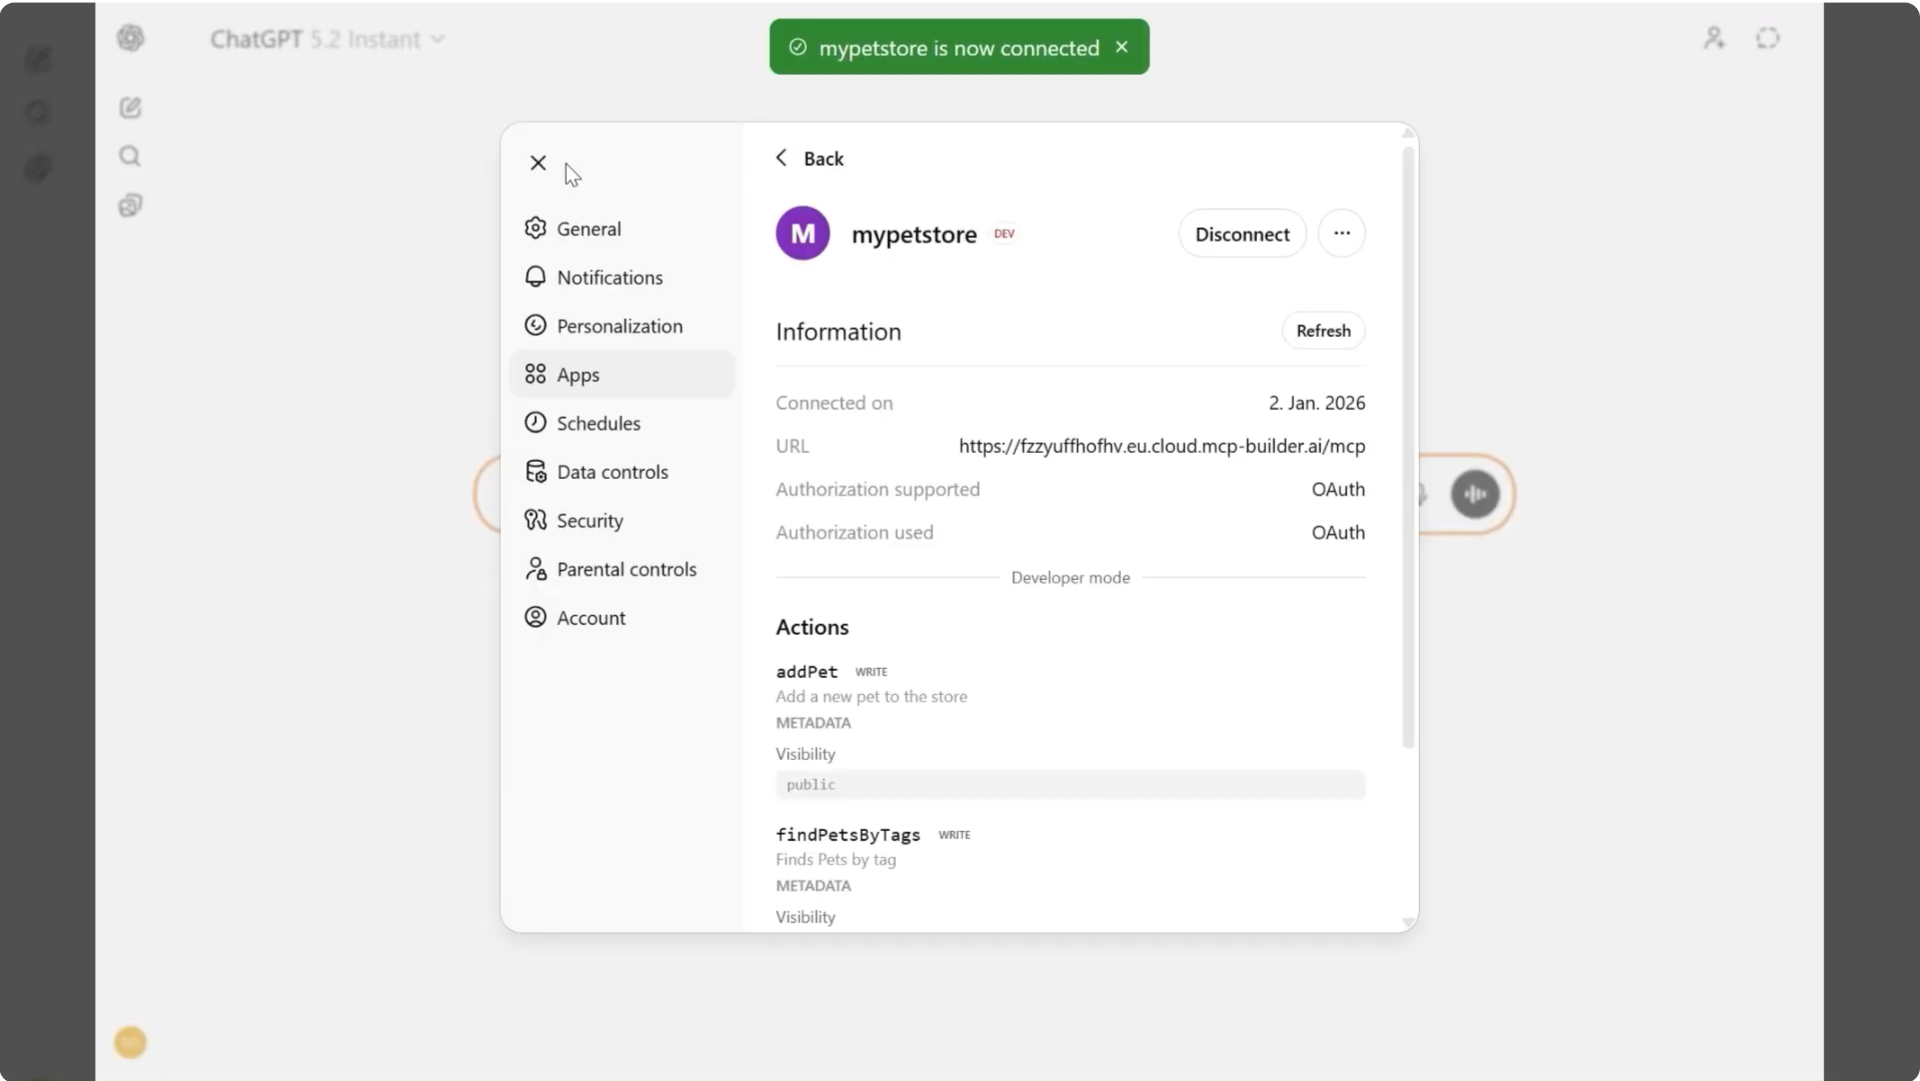
2. App Successfully Added:
Once connected, you'll see your app listed in ChatGPT's available integrations. The Pet Store app is now ready to use!
Testing Your ChatGPT MCP Integration
Let's test the integration by asking ChatGPT to interact with the Pet Store API.
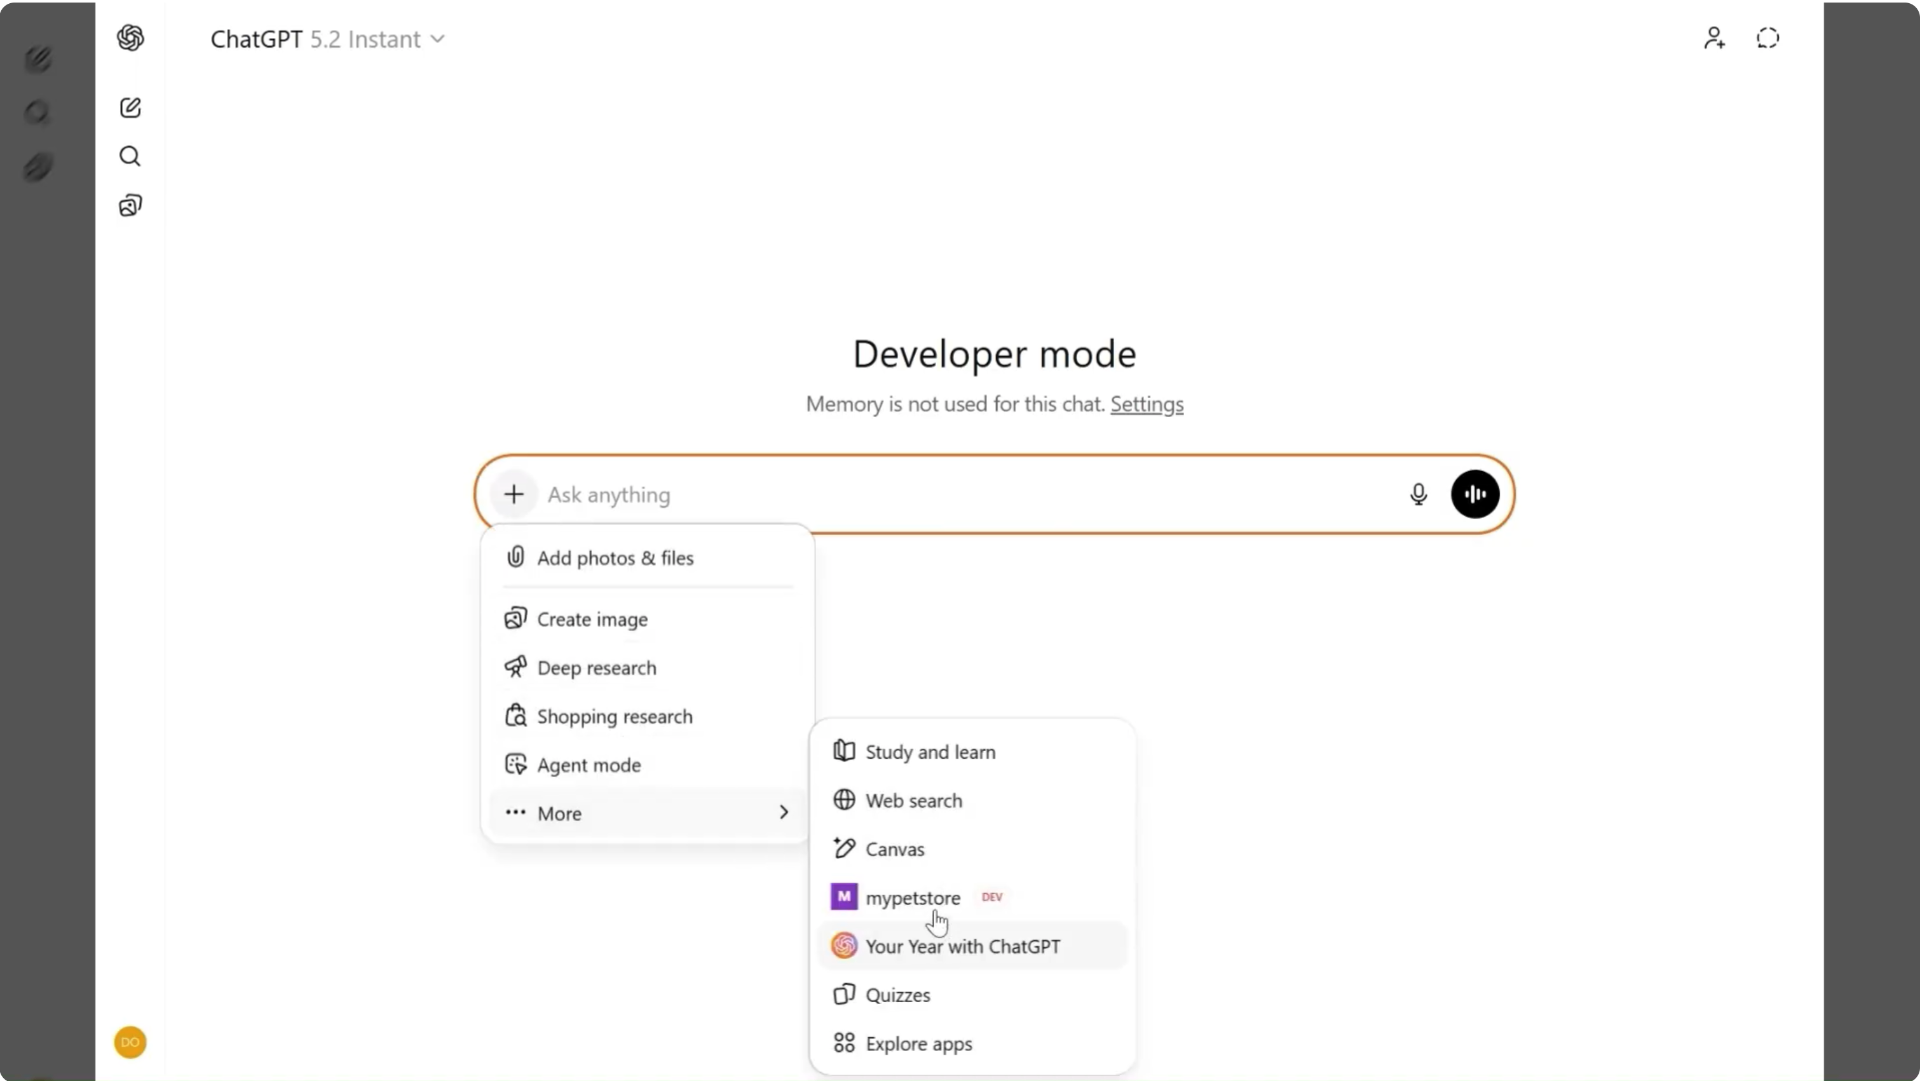
1. Start Using Your App:
In a ChatGPT conversation, add your app to the conversation, as shown in the picture.
2. Query the API:
Ask ChatGPT to find pets or perform other operations. Watch as it uses your MCP server to fetch real data!
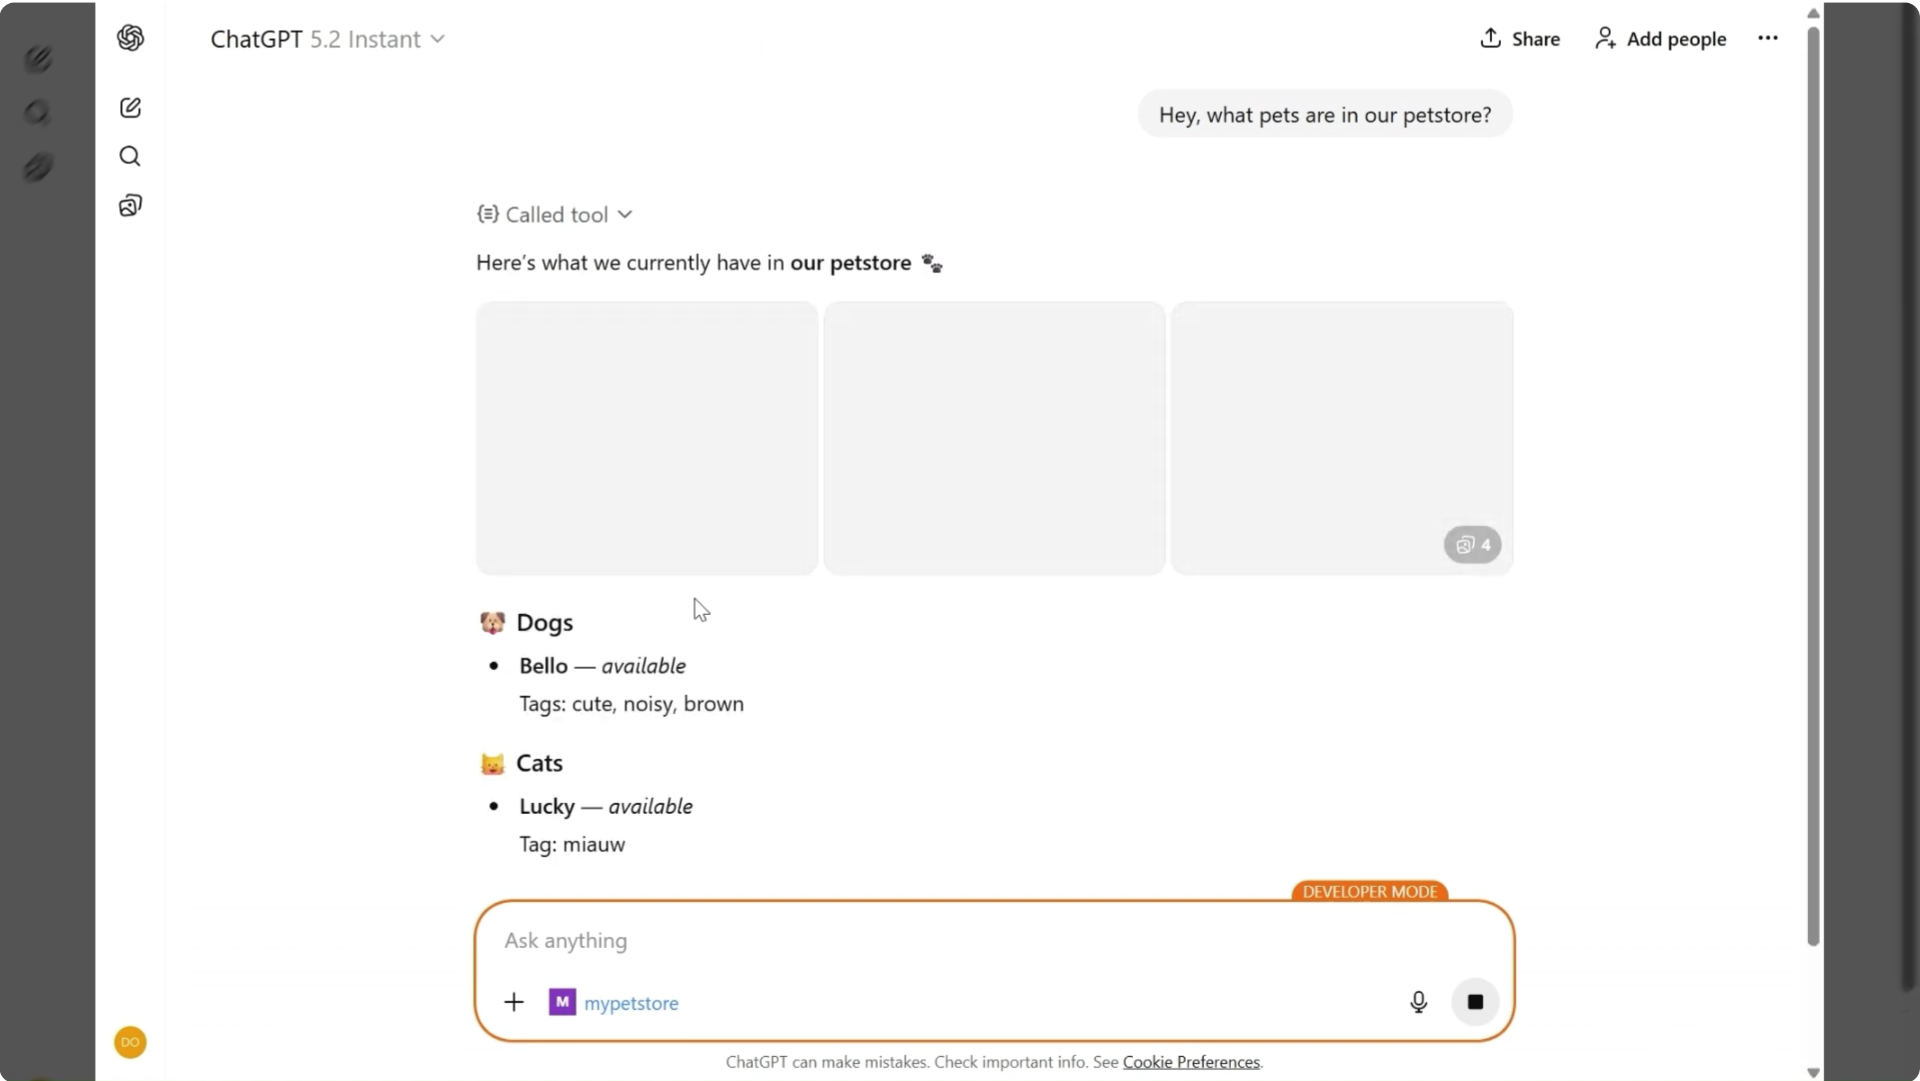
🎉 Success!
ChatGPT is now connected to your MCP server and can interact with the Pet Store API. You can extend this same pattern to any API with an OpenAPI specification.
Final Thoughts
Connecting ChatGPT to external APIs through MCP opens up powerful possibilities. Here's what you gain with this approach:
🏗️ Cleaner Architecture
Separate your AI logic from your API integrations with a standardized protocol.
🔒 Safer Interactions
OAuth authentication and explicit tool definitions keep your data secure.
📊 Better Observability
Track exactly what tools ChatGPT calls and how it uses your API.
🔧 Long-term Maintainability
Update your API without changing your ChatGPT integration code.
The Model Context Protocol is becoming the standard way to connect AI with external systems. By learning it now, you're preparing for the future of AI-powered applications.
Ready to Build Your Own MCP Server?
Start building AI agents connected to any API in minutes with MCP-Builder.ai